Installation
Taqueria Installation Basics
Installing Taqueria is a quick and easy process if you understand a few basic concepts and follow the steps outlined in this guide
There are two main components you can install:
- The Taqueria CLI (required)
- The VS Code plugin for Taqueria (optional)
The Taqueria CLI is required to use the VS Code extension and as such, must be installed first
Requirements
Taqueria CLI
- Node.js v18.18 or later.
- A compatible operating system:
- MacOS
- Linux
- Windows (via WSL 2)
- Docker v20.10.12 or later
Installing the Taqueria CLI
Overview
The Taqueria CLI is an executable binary named taq.
Installing the Taqueria CLI involves the following steps:
- Download the correct build of Taqueria for your operating system
- Make the Taqueria binary
taqexecutable - Add
taqto your shell's$PATH
To install, we recommend our one-line installer:
/bin/bash -c "$(wget -O - https://taqueria.io/install-taq.sh 2>/dev/null || curl -fsSL https://taqueria.io/install-taq.sh)"
Alternative OS Specific Instructions
- MacOS
- Linux
- Windows
- Download the latest MacOS build of Taqueria
For MacOS installations, we recommend using Homebrew:
brew tap TezosTaqueria/taqueria https://github.com/TezosTaqueria/taqueria
brew install taqueria
- Download the latest Linux build of Taqueria
curl -LO https://taqueria.io/get/linux/taq
- Make the binary file executable
chmod +x taq
- Move the binary to a directory in your shell's
$PATH
sudo mv taq /usr/local/bin
Windows users will run the Linux version of Taqueria in Ubuntu using the Windows Subsystem for Linux (WSL 2)
Requirements
You must be running Windows 10 version 2004 and higher, or Windows 11
Install WSL 2
Open a Power Shell or Windows Command Prompt as an administrator and run:
wsl --installRestart your machine
Open the Ubuntu distribution using the Start if it doesn't start automatically after restarting
Create a user name and password
Install Docker Desktop WSL 2 backend
Download Docker Desktop for Windows
Run the installer making sure to enable WSL 2 during the installation if prompted
Start Docker Desktop from the Windows Start menu
From the Docker menu, navigate to
Settings > Generaland selectUse WSL 2 based engineif not already selectedClick
Apply & Restart
To confirm that Docker Desktop backend has been installed properly, open a WSL 2 terminal and run:
wsl.exe -l -v
You should see the following output:
NAME                   STATE           VERSION
* Ubuntu               Running         2
docker-desktop-data    Running         2
docker-desktop         Running         2
Install Node v16
- Update the
aptpackage index:
sudo apt update
- Install dependencies:
sudo apt install curl git
- Download Node.js v18.18 or later.
curl -sL https://deb.nodesource.com/setup_16.x | sudo -E bash -
- (Optional) Install the node development tools
sudo apt-get install gcc g++ make
To confirm that Node v16.x has been installed properly, open a new WSL 2 terminal and run:
node --version
You should see v16.x.x or similar returned.
Install the Taqueria Binary
- Download the latest Linux build of Taqueria
curl -LO https://taqueria.io/get/linux/taq
- Make the binary file executable
chmod +x taq
- Move the binary to a directory in your shell's
$PATH
sudo mv taq /usr/local/bin
Test the CLI
At this point, Taqueria should be installed and ready to use. You can test this by running the following command:
taq --version
You should see the version of Taqueria installed output:
0.81.0
If you see this, you have successfully installed the Taqueria CLI!
Installing the VS Code Extension (optional)
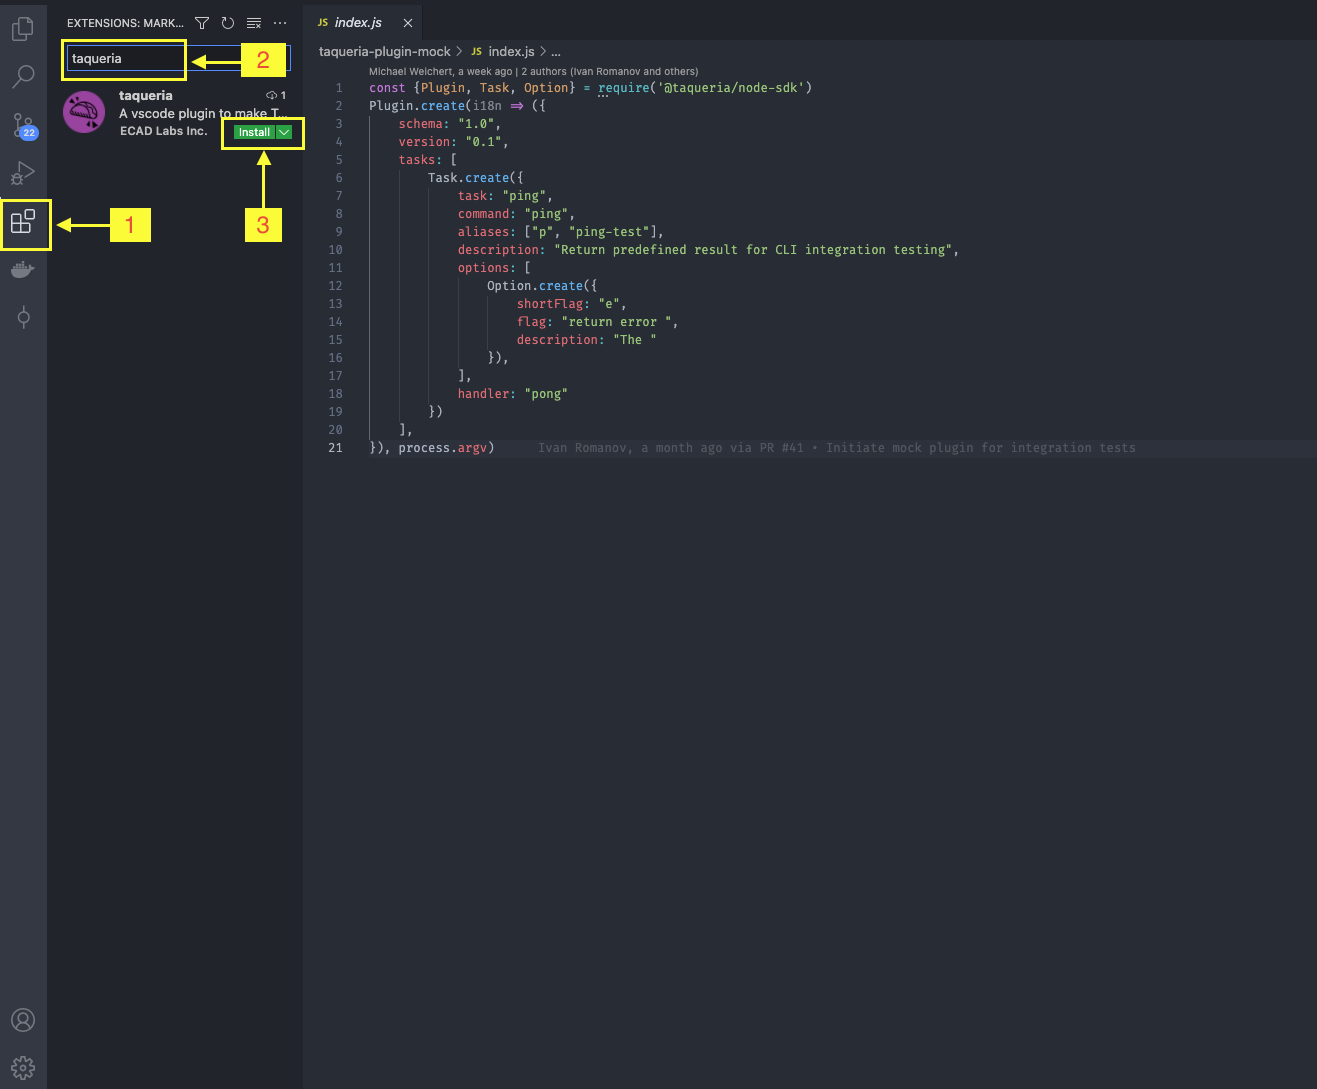
The Taqueria VS Code Extension is installed from the Extensions pane within VS Code. The steps to install are:
- Open the Extensions pane
- Type
Taqueriain the search bar - Click install